Creating an Issue
Learn how to effectively create an Issue to start building your project.
BEFORE you start creating Issues
Before you dive into Issue creation please make sure you have properly set your Project settings. All the issue properties should be set prior to creating issue itself.
These are the most important Issue properties to set:
How to Create Issue
- To create an issue go to
issuesin your project.
- Then click on
Create newbutton.
Alternatively you are able to create issue using global create button in main navigation.
In dropdown menu select Issue.
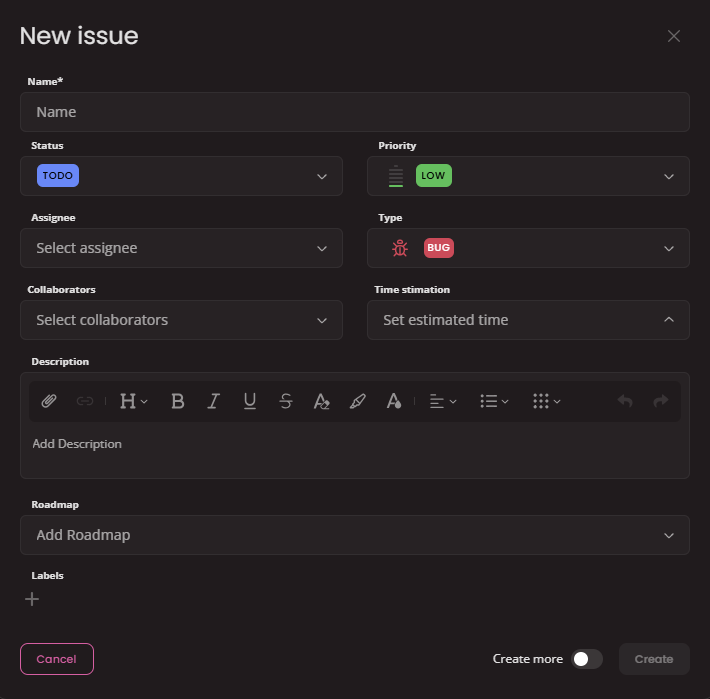
Create modal
The issue creation form contains several fields. The only mandatory field is the issue name. The status, priority, and issue type fields will have default values, but you can modify them as needed. All other fields are optional.

- Assignee: Specify the primary user responsible for addressing the issue.
- Collaborators: Add additional users who will contribute to the issue.
- Time estimation: Provide an estimated time required to complete the issue (in hours and minutes). This field is important for evaluating the scope success in terms of Time spent.
- Description: Enter detailed information about the issue, including background, steps to reproduce (if applicable), and expected outcome. This is the main place for describing your task.
- Roadmap: Assign the issue to a specific project roadmap or milestone.
- Labels: Add relevant tags or keywords to categorize and filter issues.
Create more switch at the bottom of the window.Issue detail
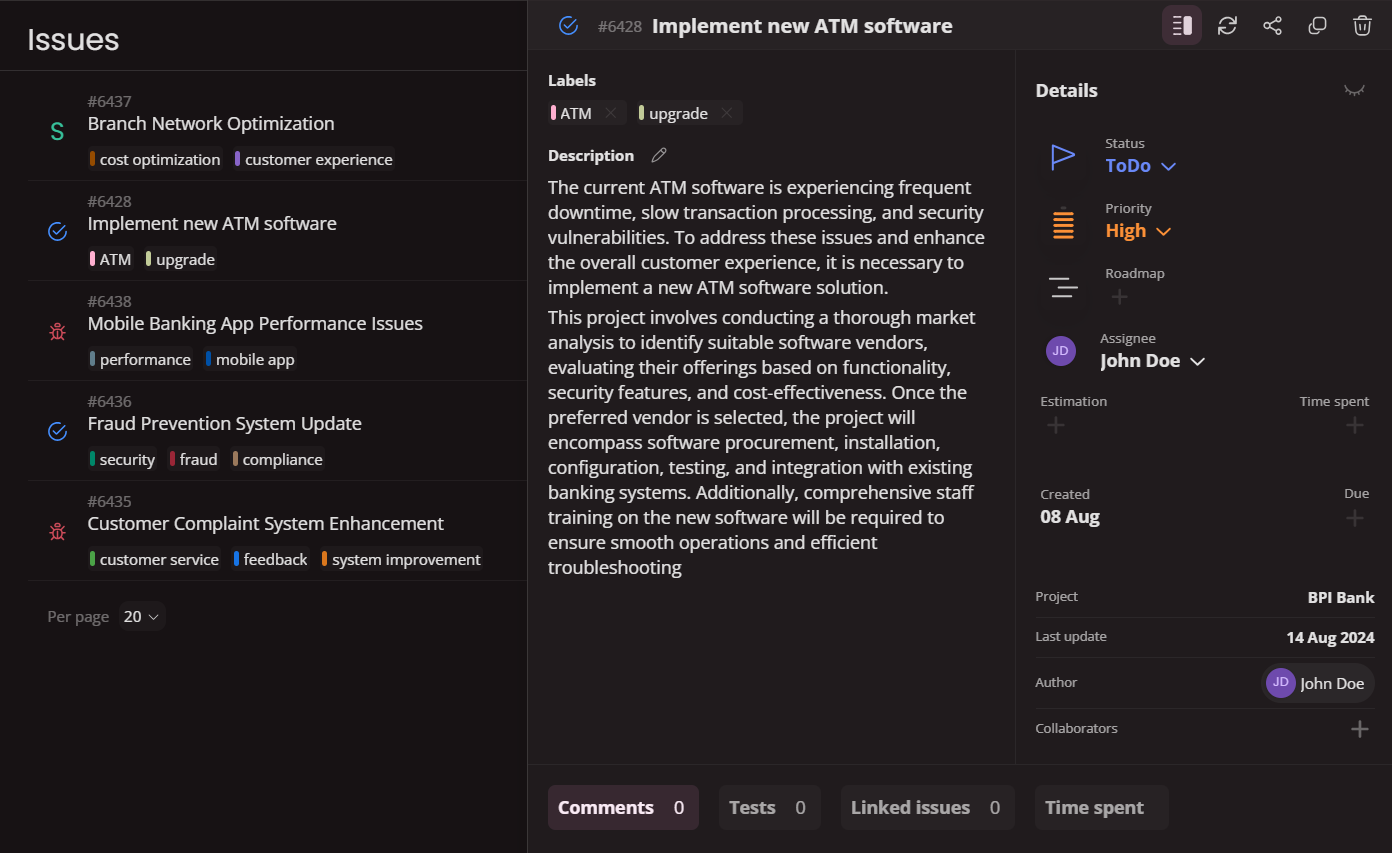
Opening an issue displays its details in a resizable overlaying side window. This allows you to view issue information while continuing to work within Juno.

All the details you filled during the creation is displayed and organised for seamless work on resolving the issue.
At the bottom of each issue there are tabs for comments, linked test cases, linked issues and tab showcasing all the time spent on this issue.
Introduction
Issues are building blocks of your project. Learn how to define, track, and manage issues within your project in Juno.
Operations with issues
From Filtering and editing issues in bulk to sharing, clonning and linking related tasks, you'll find detailed explanations and instructions for all essential issue operations.


