Users
Find out how to set Users in your workspace. Without your teammates any project is useless.
Create a Users
You are able to create as many users as you have set in your subscription plan. In a case you need to create more users, please first follow the procedure to increase a total number of users in your billing plan.
To create a user go to Settings - Users & Teams.
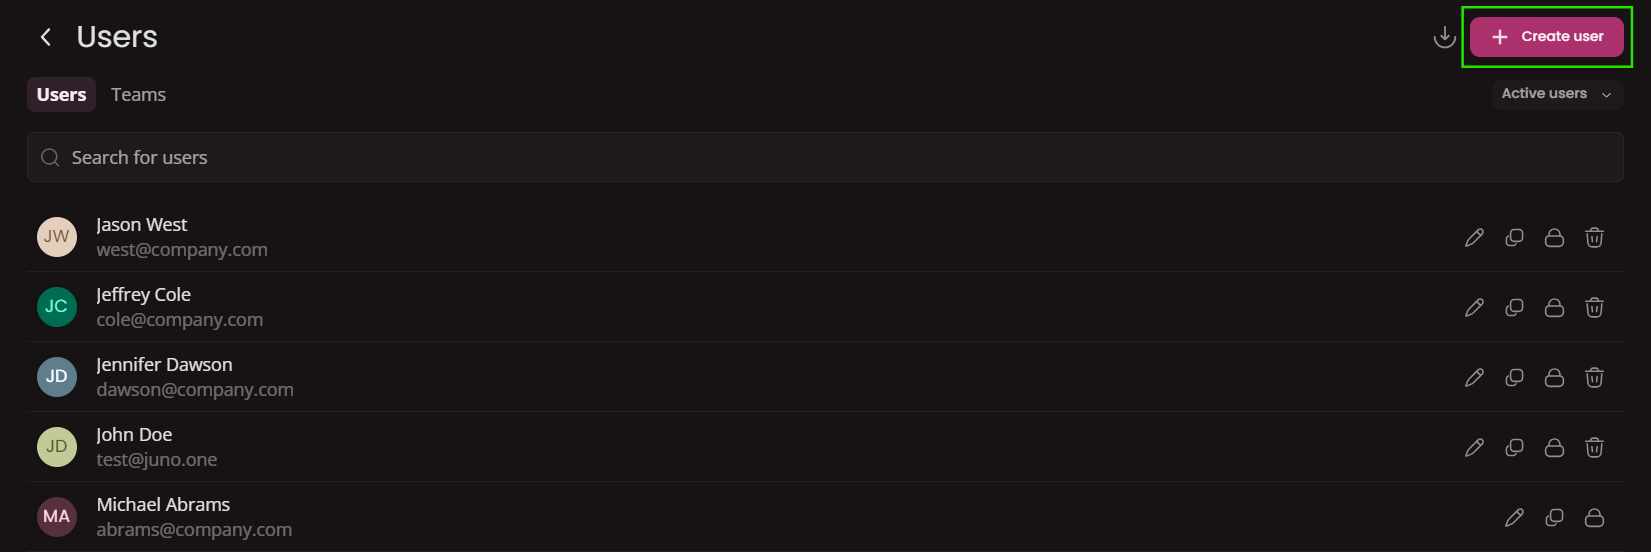
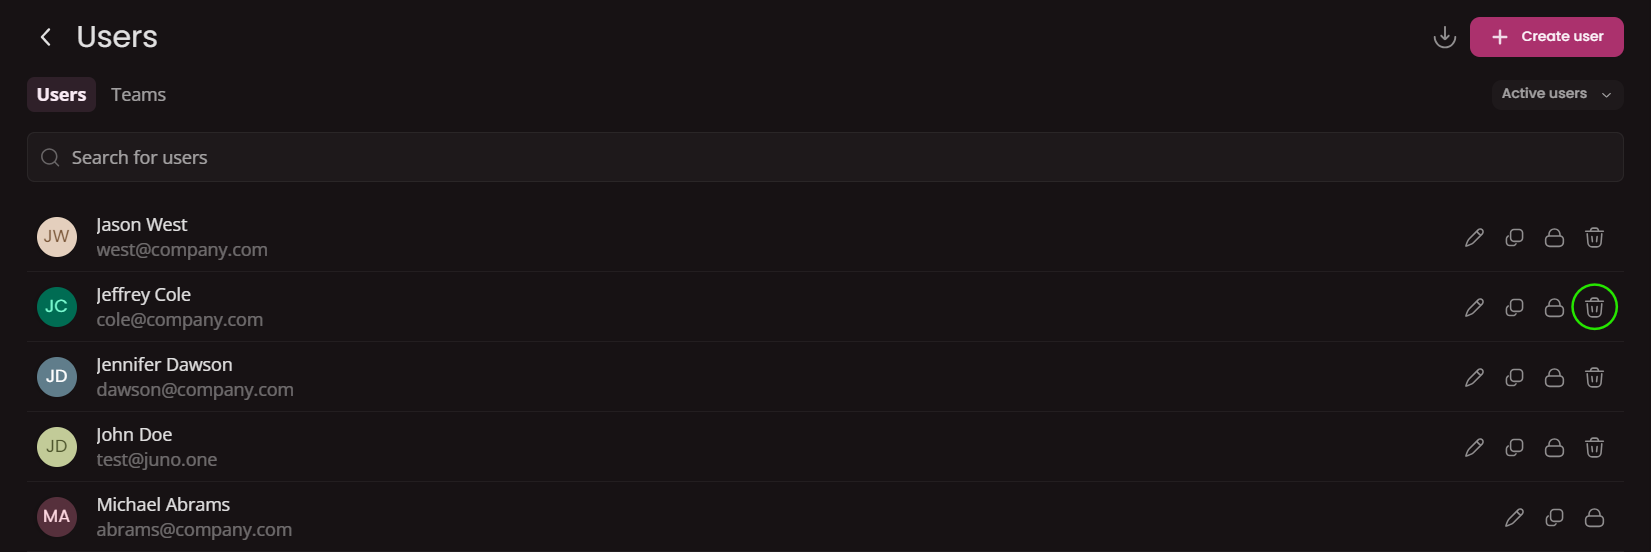
In the Users tab click the Create new button.
In create modal there are 3 steps to go through. Each one is described bellow:
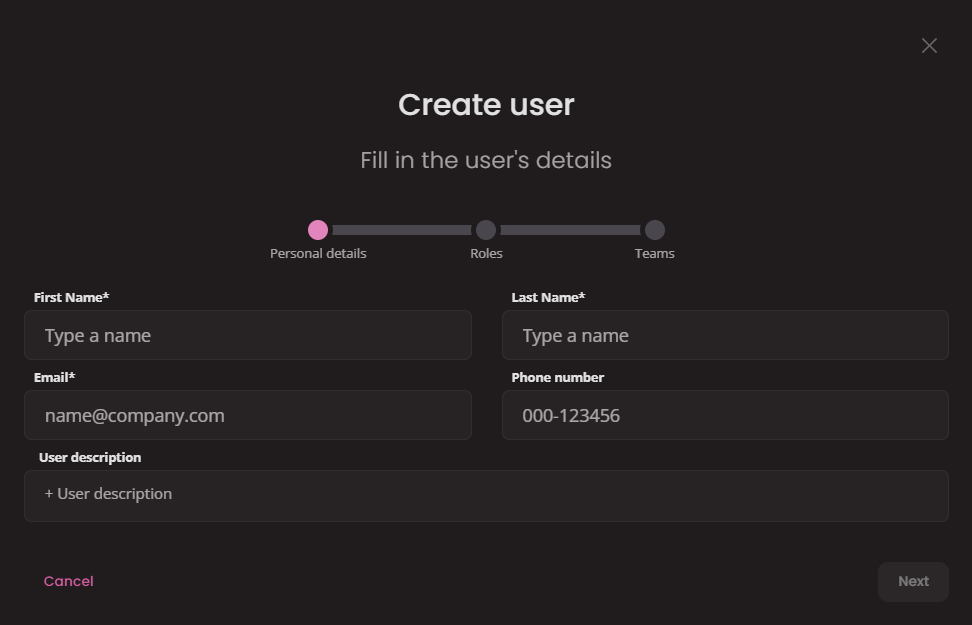
- First name(required): Type user's first name.
- Last name(required): Type user's last name.
- Email(required): Type user's email.
- Phone number: User's phone number (international format recommended).
- User Description: A space for additional notes, contacts, personal weblinks or storing user related documents as attachments.
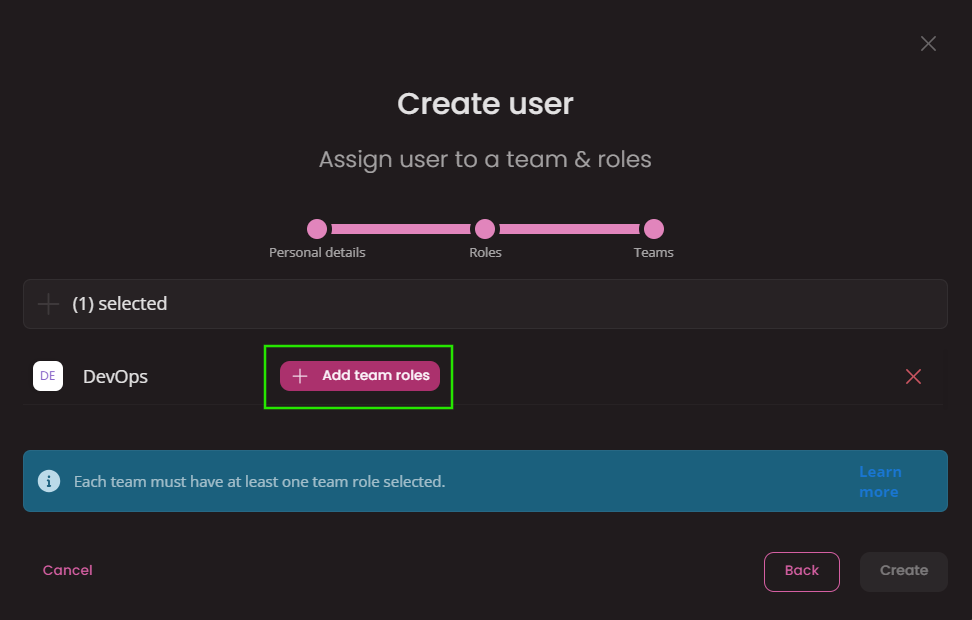
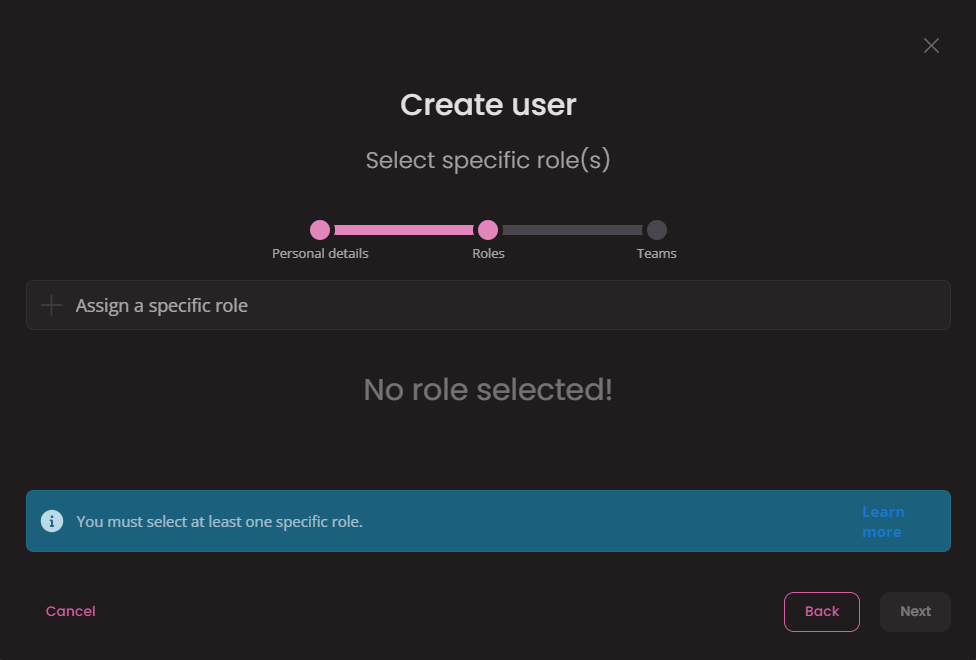 In this step you will select what Specific role(s) the user will be assigned. It is mandatory to select at least 1.
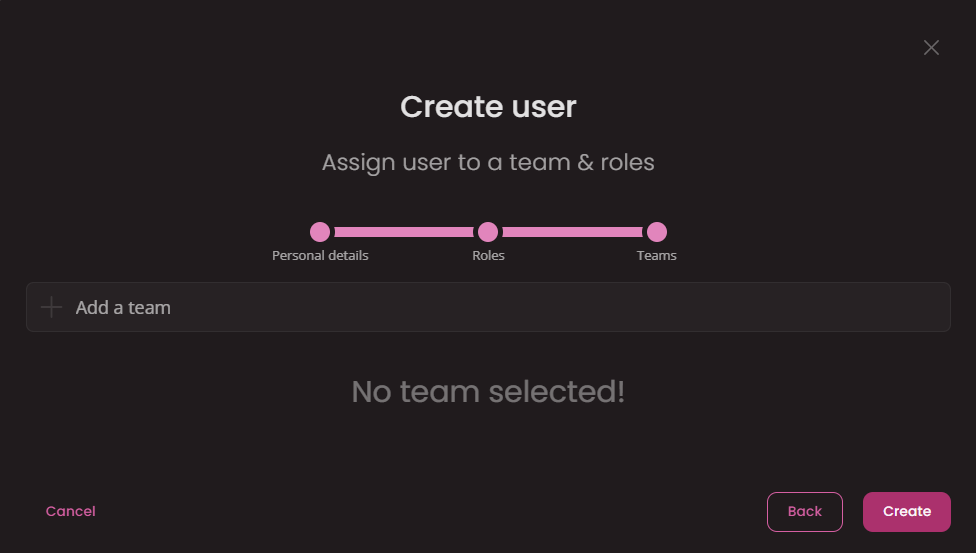
Edit a user
By clicking on the user's name or selecting the Edit action on the right side of the user line, a side window will open where you can adjust all information about the user.
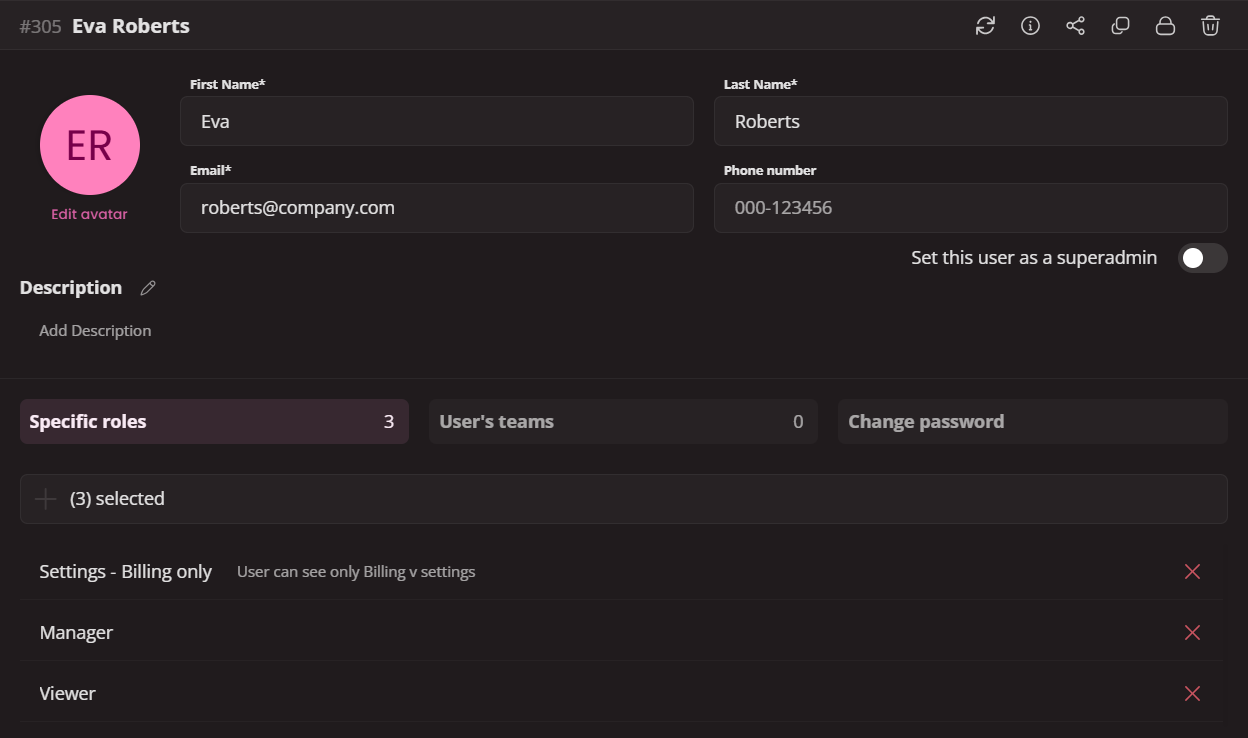 The adjustable information is the same as when creating a user. You are able to edit:
- First & Last name
- Phone number
- User's description
- Avatar
- Set as super admin: Super admin has access to all features of juno.one, regardless of the user's team roles and specific roles. Only super admins are able to grant another user super admin rights.
- In the bottom part there are 3 tabs where you can edit user's Specific roles, Teams & team roles or Change user's Login password.
Lock a user
To lock a user click the Lock button.

Unlock a user
To unclock locked user first click the filter dropdown and check Locked.
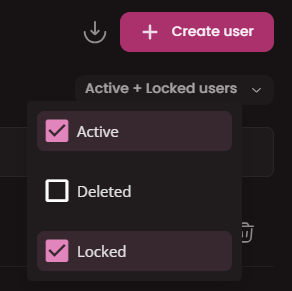
After that you will see all locked users.
Find the user you wish to unlock and click Unlock button.

Unlocked users will gain access to all the previously assigned roles & permissions or their work.
Delete a user
To delete a user click the Delete button.
Restore a user
Deleted users remain in the system as decativated and is possible to restore them eventually.
To restore a user first click the filter dropdown and check Deleted.
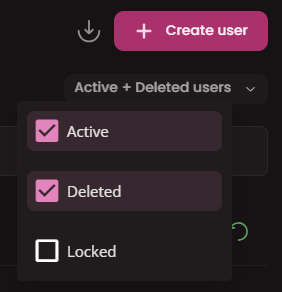
After that you will see all deleted users.
Find the user you wish to restore and click Restore button.

Clone a user
Any existing user can be clonned. This option is effective in a case you want to create a new user with exact the same teams & permissions.
To clone a user click the Clone button.

A new 3 step create modal will open with prefilled details from the existing user. Adjust the details as necessary and submit new user in the 3rd step.
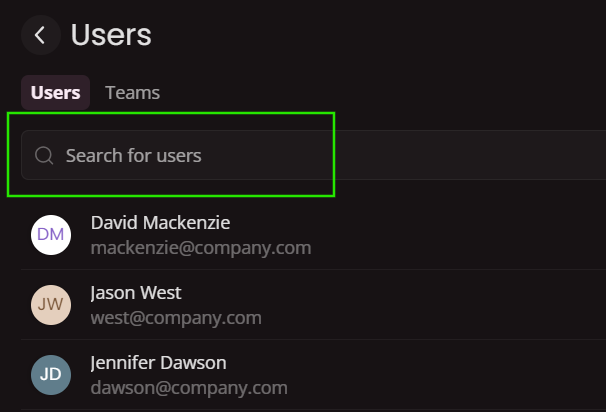
Search for user
To search a user use name or email address.
Import users
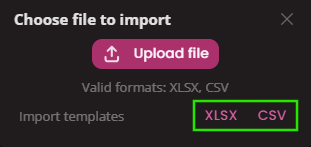
It is possible to bulk import your own list of users by uploading an Excel sheet with all the necessary information. Juno.one provides you with an XLSX/CSV template that needs to be used for the bulk import:
To import users from external file click the Import button.

Download a XLSX or CSV template file.
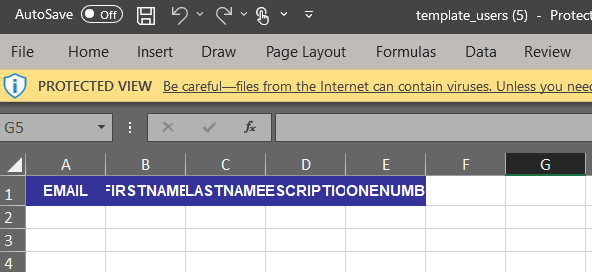
Template file looks like this...
Once you have created your file click on Upload file and select your import file.
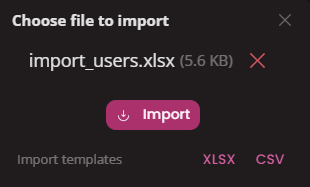
Click to import and all the users will be created and you'll be able to work with them further.