Operations with issues
From Filtering and editing issues in bulk to sharing, clonning and linking related tasks, you'll find detailed explanations and instructions for all essential issue operations.
Operations over multiple issues
Search
The search works as a part of filter but stands alone in quick actions for faster navigation.
The search is able to use ONLY for searching by issue names or by ID number (in this case you have to start search query with hashtag - for example #XXX).

Filter
Issue filter is powerful way to find issues relevant to your needs in larger volumes.
You can filter based on these 8 criterias:
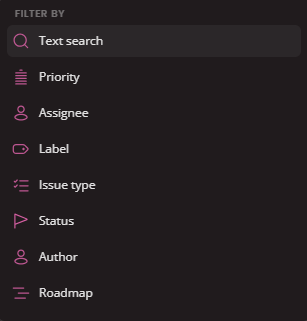
- Text search : This is the same as the Search above. You can search by text in issue names or ID numbers (must start with #)
- Priority : Filter issues by one or more priorities. Results will show issues matching any of the selected priorities.
- Assignee : Filter issues by one or more Assignees. Results will show issues assigned to any of the selected users.
- Label : Filtering issues by It's assigned label. You can select multiple labels and filter projects that includes all of selected labels or any of them.
- Issue type : Filter issues by one or more Issue types. Results will show issues matching any of the selected Issue types.
- Status : Filter issues by one or more statuses. Results will show issues matching any of the selected statuses.
- Author : Filter issues by one or more authors. Results will show issues matching any of the selected authors.
- Roadmap : Filter issues by one or more roadmaps. Results will show issues added to any of the selected roadmaps.
Bulk edit
Bulk Edit is a feature that allows you to efficiently apply the same action to multiple issues at once, saving time and effort. By selecting a group of issues, you can quickly update their properties or perform other actions without having to edit each issue individually.
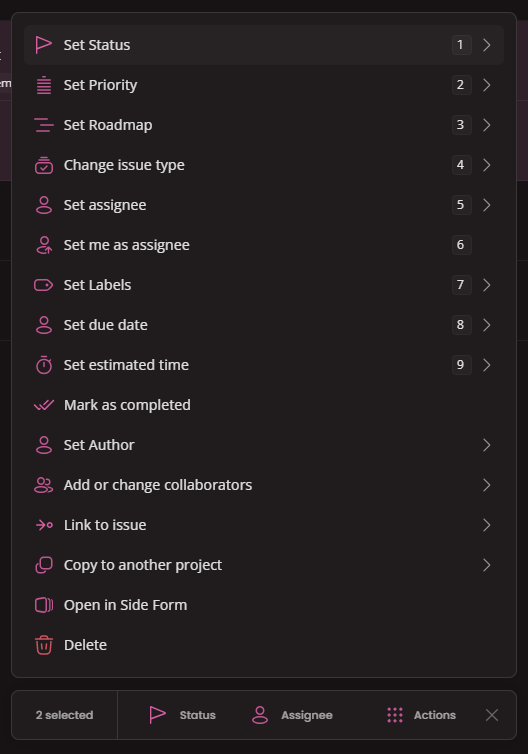
Available Bulk Actions
- Set status: Change the status of multiple issues to a specific value.
- Set priority: Adjust the priority level of multiple issues.
- Set roadmap: Assign multiple issues to a particular roadmap.
- Change issue type: Modify the type of multiple issues.
- Set assignee: Assign multiple issues to a specific user.
- Set me as assignee: Assign multiple issues to yourself.
- Set labels: Add or remove labels from multiple issues.
- Set due date: Assign a due date to multiple issues.
- Set estimation time: Estimate the time required to complete multiple issues.
- Mark as completed: Set the final status for multiple issues, indicating that they are complete.
- Set author: Change the author of multiple issues.
- Add or change collaborators: Add or remove collaborators from multiple issues.
- Link to issue: Connect multiple issues to a specific issue using the issue linking feature.
- Clone to another project: Duplicate multiple issues and move them to a different project.
- Open in side form: Open multiple issues in separate windows for individual editing.
- Delete: Deactivate multiple issues from the project.
Link issues together
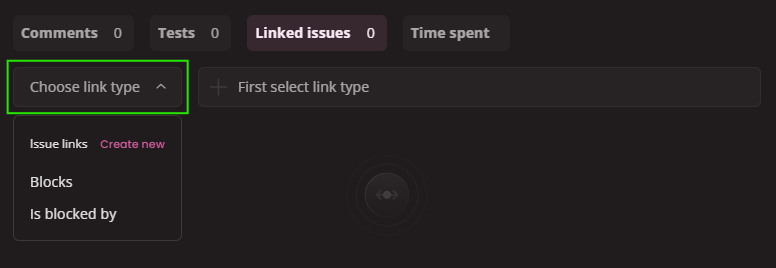
In order to link issues together first open an issue. At the bottom of every issue/test case you'll find the Linked issues tab.

In linked issues start by selecting the link type.
Next choose an issue you want to link with. The input works as search field, just start typing the name and you should get the results instantly. Just click on any issue and this will be then linked immediately.
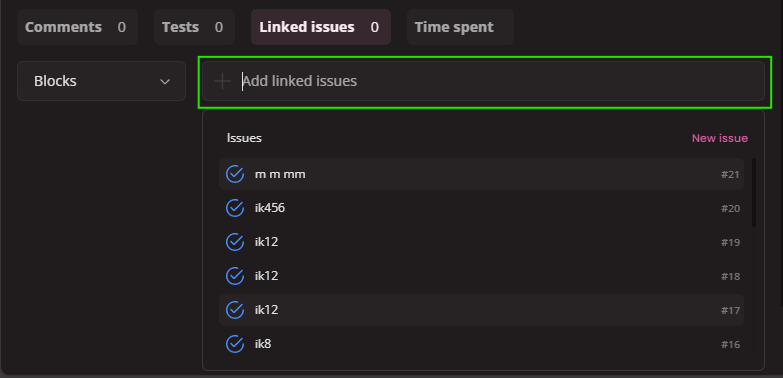 There is also an option to create a new issue and link it directly. For example issue you want to link is not yet created or you can't find any that's appropriate. In this case click on
 New issue in the dropdown menu (picture above).
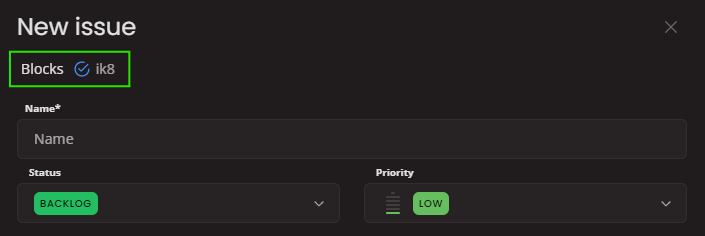
You will see a classic Create issue modal with preselected link. After saving the new issue this will be linked automatically to the one you see in the modal.
Unlink issues
To remove a link between two issues click on the Unlink button at the end of line. Issues on both side of the link are unlinked instantly.

Operations with single issues
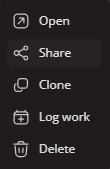
Any of the following operations can be performed via Right-click on any issue in Issue table.
Share issue
First open selected issue in Side form and click on Share icon in top bar.

URL address to your Issue will be copied to your clipboard for easy sending via message or email.

Clone an issue
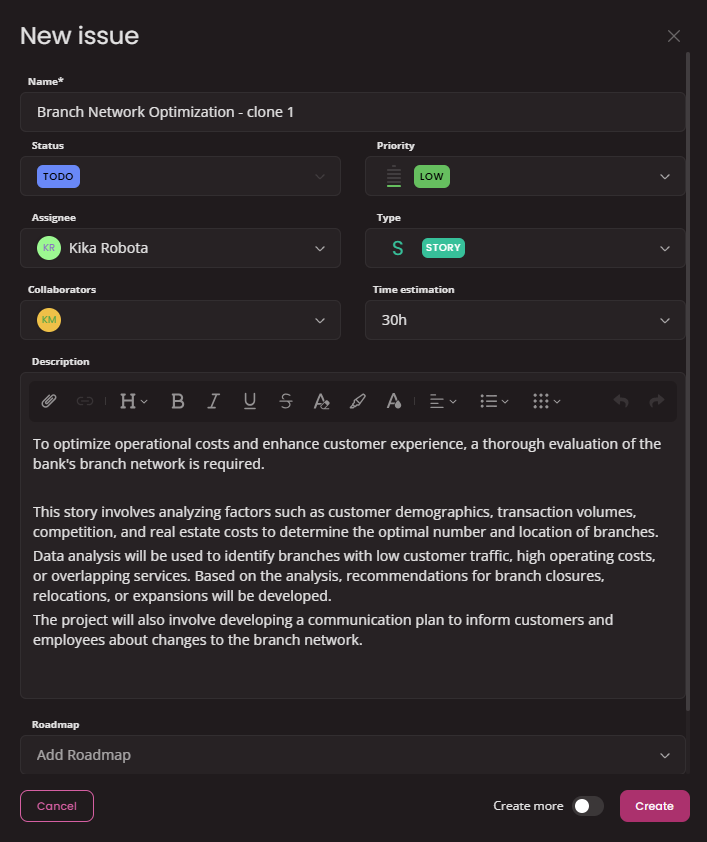
First open selected issue in Side form and click on Clone icon in top bar.

A new Create window will open with prefilled content from your previous issue. You can adjust the details if necessary and submit to create a new copied issue.
Delete issue
First open selected issue in Side form and click on Delete icon in top bar.

An alert message will appear to inform you that issue has been deleted.

Restore issue
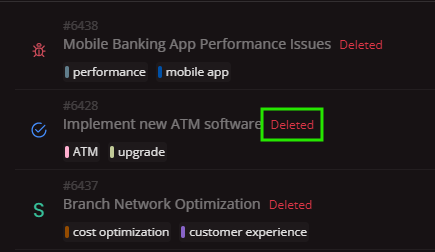
To restore deleted issue first click on display preferences icon and in Show results line select Deleted in the dropdown list.
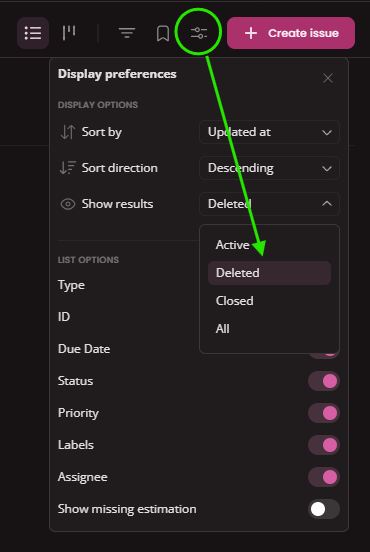
In this step you will see only deleted issues. Select the you want to restore and open it in Side form.
Click on Restore icon in top bar.

Alert message will appear to inform you about performed action.
